Virtual Machine
This guide will quickly take you through the process of running Paradrop in a virtual machine.
NOTE: These instructions assume you are running Ubuntu. The steps to launch a virtual machine may be different for other environments.
Environment setup
These steps wil download our router image and launch it a virtual machine.
Install required packages:
sudo apt-get install qemu-kvm
Download the latest build of the Paradrop disk image. https://paradrop.org/release/latest/paradrop-amd64.img.xz
Extract the image:
xz -d paradrop-amd64.img.xz
Launch the VM:
sudo kvm -m 1024 \
-netdev user,id=net0,hostfwd=tcp::8000-:8000,hostfwd=tcp::8022-:22,hostfwd=tcp::8080-:80 \
-device virtio-net-pci,netdev=net0 -drive file=paradrop-amd64.img,format=raw
First Boot Setup
After starting the virtual machine for the first time, please allow about three to five minutes for the initialization to complete. During this time, the device will finish installing software packages and prepare the device to receive updates. After the setup is complete, a login prompt will appear. The default username is “paradrop” with no password.
The Paradrop node runs various externally-accessible services including an SSH server, a web-based administration panel, as well as software that you decide to install. The kvm command we used includes three port forwarding rules that expose these services to the host running the virtual machine. While following the instructions in the Quick Start section keep the following in mind.
- The admin panel can be accessed by a web browser on the host machine via the following URL: http://localhost:8080/#!/tools.
- The SSH server can be accessed through a non-standard port using the following command: ssh -p 8022 paradrop@localhost.
Alternative Setup Using virt-manager
Even though many developers prefer command line tools to manage virtual machines, some developers likes to use GUI tools. In addition, GUI tools are convenient to support some advanced features, e.g., assigning some peripheral devices (USB WiFi dongle) from host to virtual machines. We recommend using “virt-manager” to run ParaDrop virtual machines. If you have not installed it on Ubuntu, you can use below command to install it:
sudo apt-get install virt-manager
Then we can start virt-manager with below command:
sudo virt-manager
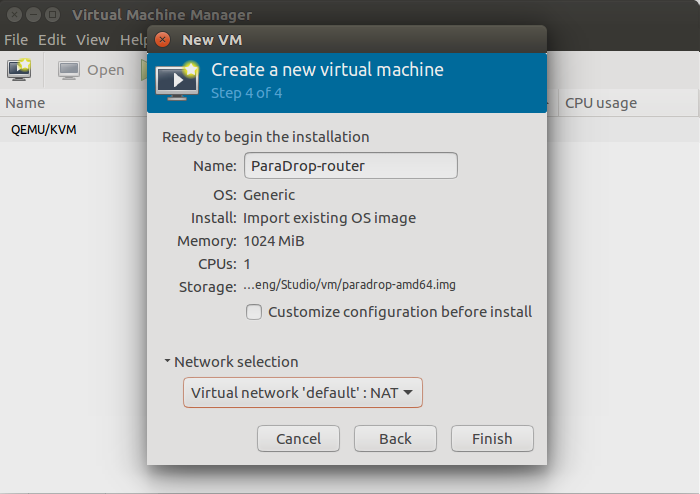
We can create a VM with the ParaDrop disk image.
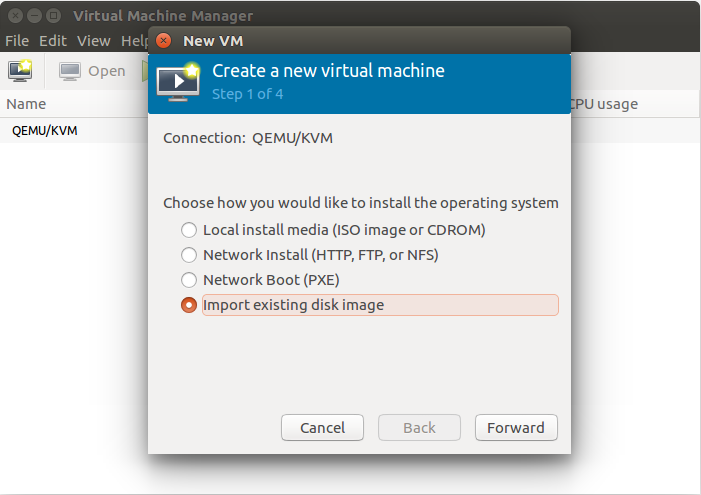
Below is the configuration of the VM.
After that, we can boot the VM and configure the first boot as we do when run the VM with command line tools. However, the VM will have an IP address 192.168.122.x, so we can access http://<IP address of the VM> to access the portal to upload ssh keys, and then login to it directly with the IP address.
We can assign the USB WiFi dongle from the Host to the ParaDrop VM so that the ParaDrop running on the VM can support features related to WiFi. Before we do that, we need to disable the WiFi device for Host. We can do that with “rfkill” command. Run below command to get the number of the WiFi device:
rfkill list
Suppose the index of the WiFi device we want to assign to the ParaDrop VM is 2, then run below command to disable it for host OS:
rfkill block 2
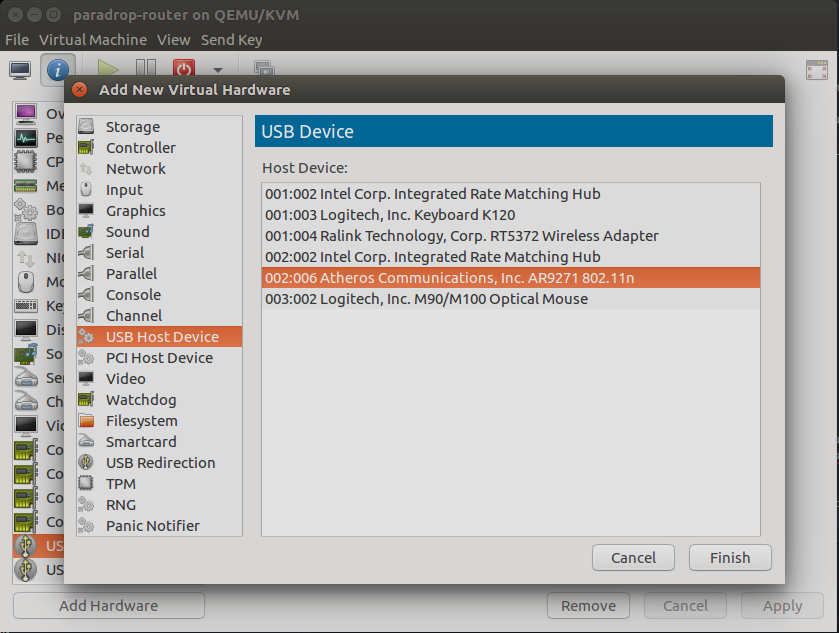
Then we can add the USB WiFi dongle to the VM.
We can run below command in ParaDrop VM to verify that the WiFi device has been detected:
iw dev
Sometimes, we have to repeat above steps to make sure the WiFi device can be used by the ParaDrop VM.
Connecting to the Node
Please allow three to five minutes for the initialization of the node to complete. During this time, the node will finish installing software packages. After the setup is complete, a login prompt will appear. The default username is “paradrop” with no password.
When using virt-manager to run a Paradrop node, virt-manager will create a virtual network and assign an arbitrary IP address to the virtual machine. Take note of the IP address displayed on the console. You may need to use this address to connect to the admin panel or use pdtools commands. For example, the console below indicates that the node has IP address 192.168.122.183.
Ubuntu Core 16 on 192.168.122.183 (tty1)

localhost login: